butter

Alice Waters' Apple Tart

Ingredients

Dough:

• 1 Cup unbleached all-purpose flour

• 1/2 tsp. sugar

• 1/8 tsp. salt

• 6 Tbs. (3/4 stick) unsalted butter, just softened, cut in 1/2-inch pieces

• 3 1/2 Tbs. chilled water

Filling:

• 2 lb. apples (Golden Delicious or another tart, firm variety), peeled, cored, and sliced (save peels and cores)(Check out the ones from Moore Farms and Friends and Watsonia Farm)

• 2 Tbs. unsalted butter, melted

• 5 Tbs. sugar

Glaze:

• 1/2 C. sugar

Directions

1. To make dough, mix flour, sugar, and salt in a large bowl; add 2 Tbs. of the butter. Blend in a mixer until dough resembles coarse cornmeal. Add remaining butter; mix until biggest pieces look like large peas.

2. Dribble in water, stir, then dribble in more, until dough just holds together. Toss with hands, letting it fall through fingers, until it's ropy with some dry patches. If dry patches predominate, add another tablespoon water. Keep tossing until you can roll dough into a ball. Flatten into a 4-inch-thick disk; refrigerate. After at least 30 minutes, remove; let soften so it's malleable but still cold. Smooth cracks at edges. On a lightly floured surface, roll into a 14-inch circle about 1/8 inch thick. Dust excess flour from both sides with a dry pastry brush.

3. Place dough in a lightly greased 9-inch round tart pan, or simply on a parchment-lined baking sheet if you wish to go free-form, or galette-style with it. Heat oven to 400°F. (If you have a pizza stone, place it in the center of the rack.)

4. Overlap apples on dough in a ring 2 inches from edge if going galette-style, or up to the sides if using the tart pan. Continue inward until you reach the center. Fold any dough hanging over pan back onto itself; crimp edges at 1-inch intervals.

5. Brush melted butter over apples and onto dough edge. Sprinkle 2 Tbs. sugar over dough edge and the other 3 Tbs. over apples.

6. Bake in center of oven until apples are soft, with browned edges, and crust has caramelized to a dark golden brown (about 45 minutes), making sure to rotate tart every 15 minutes.

7. To make glaze, put reserved peels and cores in a large saucepan, along with sugar. Pour in just enough water to cover; simmer for 25 minutes. Strain syrup through cheesecloth.

8. Remove tart from oven, and slide off parchment onto cooling rack. Let cool at least 15 minutes.

9. Brush glaze over tart, slice, and serve.

Summer Squash Soup, 3 Sister's

This fantastic recipe is reprinted with the kind permission of Moore Farms and Friends, who put these beautiful summer soup kits together (shown). This delicate soup will surely become one of your favorites, too! It's an elegant way to celebrate Laurie's favorite vegetable. Many thanks to Chef Steven Satterfield for letting us share the recipe with our Members!

Serves 8

Ingredients

2 cups chopped Vidalia onion

8 cups young summer squash (zephyr, crookneck, or other tender, young variety), washed and chopped

2 cups green beans

2 cups fresh corn kernels, cut from the cob

6 tablespoons unsalted butter

4 cups chicken broth or water

Kosher salt to taste

Freshly ground black pepper to taste

A few gratings of fresh nutmeg

Directions

1. In a sauce pot, heat the butter until foamy and add the vidalias. Season the onions lightly with salt and pepper and sauté for several minutes until translucent, being careful not to brown them.

2. Add the squash to the pot and season lightly with salt and pepper. Stir well to coat and sauté for a few minutes to release the juices and flavor from the squash into the pot.

3. Add the chicken broth or water, just enough to come below the top of the vegetables in the pot. Simmer until squash is tender. Transfer in batches to a blender and blend until smooth. Serve hot with a grating of fresh nutmeg across the top of the soup. Stop here for Steven Satterfield's original soup, continue for something even better.

4. Wash, trim ends and chop Beans into 1/4" bits. Cut fresh Corn kernels from the cob. You want 2 cups of prepared Beans and Corn to add.

5. Saute Beans and Corn with 1T Olive Oil, salt and pepper until just tender.

6. Stir the veggies and 1/2 cup Heavy Cream into the prepared soup and serve warm, room temperature or chilled.

Lettuce + Mushrooms, Sauteed

This sauté serves as a great accompaniment to grilled meat, vegetables, or seafood because of its combination of freshness and earthiness.
Makes 4 servings

Ingredients
1-tablespoon extra-virgin olive oil
2 tablespoons butter (Banner Butter at Moore Farms and Friends)
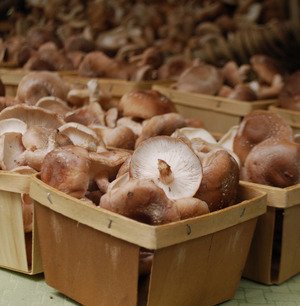
1/2 pound mushrooms, steamed, wiped clean and sliced (Sparta Imperial Mushrooms)
Salt and pepper to taste
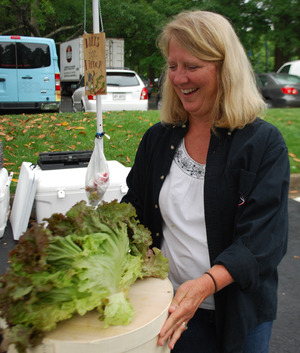
1 pound chopped lettuce (Hickory Hill Farms)
1/2 cup cream
1-teaspoon fresh thyme

Directions
1. In a medium saucepan, heat the oil. Add the butter, and allow it to melt. When the pan is hot and the butter is beginning to brown, add the mushrooms and let them cook for 2-3 minutes or until brown. Stir the mushrooms, and season with salt and pepper to taste.
2. Once the Sparta Imperial mushrooms are tender and most of the moisture has evaporated, add the Hickory Hill Farm lettuce. Season with additional salt and pepper, if needed, cooking until the lettuce is tender. Add the cream and the thyme. Cook until the cream is reduced and thickened. Remove from heat. Serve warm.

Salsify fritters

Yield
5-6 patties

Ingredients
10-12 ounces black or white salsify
2 tablespoons butter
2 eggs
3 tablespoons dried bread crumbs
3 tablespoons fresh parsley, chopped
1 clove garlic, minced
Pinch of thyme
Salt and pepper to taste
1/2 lemon juiced, 1 lemon wedge for garnish (optional)
Oil for frying
Plain Greek yogurt as garnish

Directions
1. As salsify emits a sticky milky substance, it is best to scrub the salsify and peel it using a vegetable peeler under running water.
2. Once the salsify is peeled, use a food processor to coarsely grate it.
3. Heat the butter in a frying pan and add the salsify and thyme.
4. Sauté the salsify until it begins to soften. It will be about 15 minutes.
5. Meanwhile, chop the parsley.
6. When the salsify has become soft, remove from the heat and place in a bowl.
7. Add the breadcrumbs and mix well.
8. Add the parsley, garlic and egg.
9. Season with salt and pepper and mix.
10. Form the salsify mixture into 5-6 patties.
11. Heat the oil in frying pan and fry the fritters until golden on both sides.
12. Remove from the heat.
13. Lightly sprinkle a bit of lemon juice on each of the patties and top with a dollop of plain Greek yogurt.

More About Salsify
Salsify, Salsify, what is this strange root? If you were at market 2 weeks ago and stopped by Good Groceries and saw a strange skinny looking parsnip, you should win the golden farmers market award for finding the most unusual veggie at a market! This yummy root is surely not a normal find at any farmers market. Salsify is a white root or black depending on the variety, like a parsnip but skinnier.    All parts of the plant are edible. The greens are sweet, the root is tasty and easy to cook, and as if that weren’t enough, salsify’s purple flowers are really pretty.

Don’t mind the way the roots look; they are tan and shaggy with coarse side roots.  The taste out weighs the look of this root crop. To make them visually more appealing one can peel them with a vegetable peeler to reveal the snow-white flesh. They will oxidize (turn a darker color) so you can place them into a bowl of water with lemon juice, to keep them snowy white. If you plan to steam them and brown them in butter (I would!) then there is no need for soaking them in lemon juice that snowy white color will be disguised by the cooking process.  You can also use the greens, which look like tall, wide grass blades. The light-colored part of the leaf, the bottom six inches or so, is tender and delicious, like the bottom of a leek, and can be sautéed along with the roots.

The most surprising thing about salsify, the first time you eat it, is its flavor. Traditionally it is called “oyster plant,” and some folks say that they taste like oyster mushrooms. Don’t let that scare you off the root taste a lot like artichoke hearts, which is something we don’t get at a local farmers market in Georgia. I will take salsify over an artichoke heart any day!

Good Groceries at Tewksburry Farm has the white salsify this week and will have the black salsify very soon. Be sure to stop by his booth to get the ever so righteous salsify. Here are some recipes to try out. You can use the white salsify for the black in any of these recipes.

Foraged Mushrooms + Oats

Tyler Williams' revolutionary Foraged Mushrooms and Oats
brought a breakfast dish to the level of a risotto you'd lust for
any hour of the day.

Ingredients
Oatmeal
1 cup Steel cut oats, rinsed
4 cups mushroom stock
2 cups wild mushrooms, sautéed
1/2 cup butter
2 tablespoons thyme
salt and pepper, to taste

Caramelized Buttermilk
1/2 cup buttermilk
1/4 cup Non-fat dry milk solids
2 tablespoons sugar

Chef’s Instructions:
For the oats

1. Bring mushroom stock to a boil in a medium stock pot.
2. Add a good pinch of salt and whisk in oats.
3. Bing to a boil and skim off any impurities that rise to the surface.
4. Reduce the oats to a simmer and add the remaining ingredients.
5. Simmer 1 hour stirring often until the mixture has thickened to saturate.
6. Season with salt and pepper to taste.

For the buttermilk
1. Place all ingredients in a small saucepan and reduce until light golden brown and thickened. Transfer to a blender and puree until smooth.

To finish
1. Place 1/2 cup of oatmeal in a bowl and drizzle with the caramelized buttermilk.
2. Top with a fresh seasonal raw vegetable salad from your farmers market and dress with lemon juice and olive oil.

Serves: 4 to 6

Chard, Sauteed

Ingredients
1 large bunch of fresh Swiss chard (Rise N Shine Farm and Woodland Gardens)
1 small clove garlic, sliced (Hickory Hill Farm)
2 Tbsp coconut oil (or your favorite oil to sauté with)
2 Tbsp water
Pinch of dried crushed red pepper (3 Porch Farm)
1 teaspoon Banner Butter (Moore Farms and Friends)
Salt (Beautiful Briny Sea)

Directions
1. Rinse out the Swiss chard leaves thoroughly. Remove the toughest third of the stalk. Roughly chop the leaves into inch-wide strips.
2. Heat a saucepan on a medium heat setting, add oil, a few small slices of garlic and the crushed red pepper. Sauté for about a minute.
3. Add the chopped Swiss chard leaves. Cover. Check after about 5 minutes. If it looks dry, add a couple tablespoons of water. Flip the leaves over in the pan, so that what was on the bottom, is now on the top. Cover again. Check for doneness after another 5 minutes (remove a piece and taste it).
4. Add salt to taste, and a small amount of butter. Serve and ENJOY!

About Swiss Chard
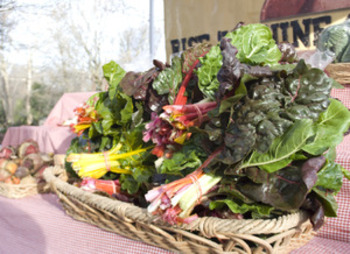
Swiss Chard is a part of the goosefoot family (Chenopodiacea) appropriately named because the leaves resemble a goose’s foot. Other members of this family are beets and spinach -- No wonder it tastes so delicious. Our farmers grow both, Green Chard and Rainbow Chard. The brightly colored Rainbow Chard will surely catch your eye but both varieties are equal in nutrition and flavor.

Chard is a nutritional powerhouse -- an excellent source of vitamins K, A, and C, as well as a good source of magnesium, potassium, iron, and dietary fiber.

If you are someone who juices, but have not yet explored vegetables, give Chard a chance. Add this leafy green to your yummy morning fruit smoothie and see how it tastes.

Chard can be cooked any way you want; boil, braise, steam or sauté. You can chop it up and include it in your favorite stuffing mix or pasta sauces. The general rule with Chard is to cook the leaves like you would spinach and the stalks like asparagus.

Carrot Soup

Jarrett Stieber's creamy carrot soup was a much needed feast of
sunny colors against a rainy afternoon.

Ingredients
2 bunches of baby carrots
1 quart of milk
1 quart of water
1 cup of honey
1 stick of butter
salt and lemon juice to taste

For Garnish
Sparta Imperial Lions Mane and Shiitake (cut into pieces and roast in a 350º oven until they look sexy)
some toasted peanuts
some ground espresso

Directions
1. One of the most convenient things about soup making is how easily you can see how much you'll be making. This recipe should yield enough soup for dinner, but if you need to make a bigger or smaller batch you can just fill up a bigger pot with more of everything and have more soup. This recipe is very easy to make and if you pay attention to the little details, it is extremely delicious and will impress your diners!
2. Take your carrots firstly and cut off the green tops (since the soup is blended, the greens will mix with the orange and you'll end up with a less pretty brown color). DO NOT THROW THE TOPS AWAY, THEY ARE NOT GARBAGE! From here, you can add the carrots (unpeeled and cut into smaller pieces to increase cook time) to a pot with all of the other ingredients and boil vigorously until the carrots are completely tender and mushy but not overcooked to the point of loosing their pretty orange color. The butter will 'break' and be floating at the top. That is ok! It will become friends with the rest of the soup when you put it in the blender.
3. Next, ladle enough of the soup mixture to fill your blend halfway (blend in batches because over stuffing will cause improper blending and the hot liquid will expand too much and teach a scalding lesson on how easy making a mess can be). Blend on high speed for about thirty to forty five seconds (hold the top of the blender down with your hand holding a kitchen towel for safety because the heat may cause it to pop off), until the mixture is very well blended. Should you want to put on your fancy pants, you can even pass this soup through a strainer to take any remaining clumps out and give it that velvety restaurant feel... but after it's blended, it's ready to eat! Taste it and adjust the seasoning as necessary. Garnish the soup with some of your mushrooms, toasted peanut, a good pinch of ground espresso (freshly ground, please... you worked hard on the soup, don't ruin it by sprinkling the top with brown sawdust!) and some of the carrot tops (picked from the stems like you would with parsley or any other herb).

More on Carrot Tops:
The carrot tops can also be used for purees, pesto or soup but I would recommend blanching them in water with a good pinch of baking soda added to it for a minute or two before shocking and pureeing (the alkaline water will preserve the color of the chlorophyll and keep it forest green instead of swamp brown).

Most importantly, eat your soup with ample beer or wine and good company!

Grits, Riverview Farms

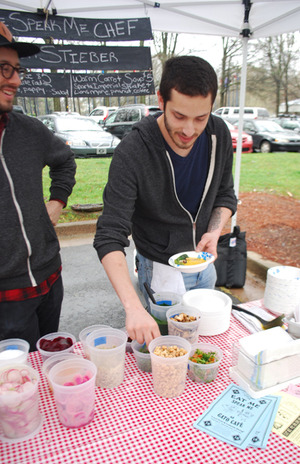
Terry Koval spoons Riverview white corn grits for the cameras. They were paired with
Sparta Imperial's mushrooms and the chef's own cheddarwurst.

Ingredients
2 cup water
1/2 cup local milk,
but if you can find local fresh cream use that instead   
1/2 teaspoon kosher salt   
1/2 cup stone-ground yellow corn grits
1/8 teaspoon white pepper
3/4 teaspoon butter

Directions
1. Add water and salt to a large pot; bring to a boil.
2. Gradually whisk in grits.
3. Lower heat; simmer 30 minutes or until thick and tender, stirring often.
4. Remove pot from heat; slowly add cold butter, season and cover.
5. Add any local sautéed greens, mushrooms, or meats on top and enjoy!